Sinovoip hat nun endlich das Image für Debian 9.1 mit Dan's 3.10.107 Kernel veröffentlicht.
Der etwas sperrige Name: 2017-08-27-debian-9-stretch-lite-preview-bpi-m2u-sd-emmc.img.zip
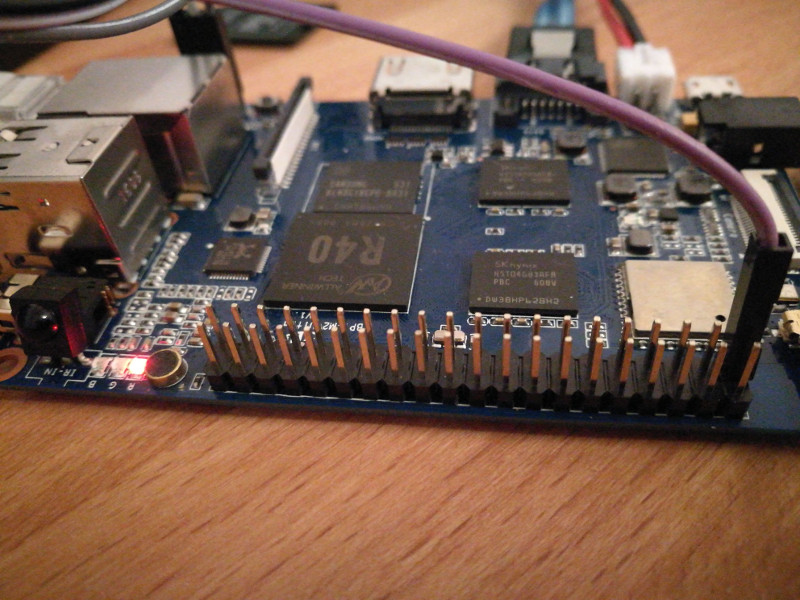
Image auf die SD-Karte getan und gebootet.
Login-Daten:
- User: pi
- PW: bananapi
- User: root
- PW: bananapi
Das Image bootet ? Über den Sinn und Zweck dieses ziemlich gebastelten Images müssen wir uns nicht weiter unterhalten. In einem eigenen Netzwerk, hinter einer Firewall, sollte es wohl seinen Dienst erfüllen. Scheint auch einiges von Armbian mit drin zu sein, zumindestens bin ich irgendwo im syslog drüber gestolpert ^^
root@bpi-iot-ros-ai:/home/pi# lsb_release -aNo LSB modules are available.Distributor ID: DebianDescription: Debian GNU/Linux 9.1 (stretch)Release: 9.1Codename: stretchroot@bpi-iot-ros-ai:/home/pi# uname -aLinux bpi-iot-ros-ai 3.10.107-BPI-M2U-Kernel #1 SMP Thu Aug 24 08:01:24 CST 2017 armv7l GNU/Linux
Was aber zählt, ist ob es stabil läuft um damit ein kleines System mit HDD laufen zu lassen für verschiedene kleinere Sachen. Das werde ich dann mal die nächsten Tage testen. Als erstes möchte ich jetzt das System in den eMMC Speicher schieben. Dafür vergrößeren wir erst mal die Rootpartition auf die maximale Größe der SD-Karte (16GB). Irgendwo muss das Image ja hin. Das kann man zum Beispiel ganz einfach mit gparted machen. Dann kopieren wir das Image auf die SD-Karte. Dann ab in den Ultra und neustarten.
Sinn und Zweck des Ganzen ist, vom eMMC zu booten, das Sys soll hinterher auf der Festplatte liegen. Auf geht's..
root@bpi-iot-ros-ai:/home/pi# fdisk -lDisk /dev/sda: 223.6 GiB, 240057409536 bytes, 468862128 sectorsUnits: sectors of 1 * 512 = 512 bytesSector size (logical/physical): 512 bytes / 512 bytesI/O size (minimum/optimal): 512 bytes / 512 bytesDisklabel type: dosDisk identifier: 0x5c5d58e0
Device Boot Start End Sectors Size Id Type/dev/sda1 2048 468862127 468860080 223.6G 83 Linux
Disk /dev/mmcblk0: 14.9 GiB, 16021192704 bytes, 31291392 sectorsUnits: sectors of 1 * 512 = 512 bytesSector size (logical/physical): 512 bytes / 512 bytesI/O size (minimum/optimal): 512 bytes / 512 bytesDisklabel type: dosDisk identifier: 0x00000b5c
Device Boot Start End Sectors Size Id Type/dev/mmcblk0p1 204800 729087 524288 256M c W95 FAT32 (LBA)/dev/mmcblk0p2 729088 31291391 30562304 14.6G 83 Linux
Disk /dev/mmcblk1: 7.3 GiB, 7818182656 bytes, 15269888 sectorsUnits: sectors of 1 * 512 = 512 bytesSector size (logical/physical): 512 bytes / 512 bytesI/O size (minimum/optimal): 512 bytes / 512 bytes
Disk /dev/mmcblk1boot1: 4 MiB, 4194304 bytes, 8192 sectorsUnits: sectors of 1 * 512 = 512 bytesSector size (logical/physical): 512 bytes / 512 bytesI/O size (minimum/optimal): 512 bytes / 512 bytes
Disk /dev/mmcblk1boot0: 4 MiB, 4194304 bytes, 8192 sectorsUnits: sectors of 1 * 512 = 512 bytesSector size (logical/physical): 512 bytes / 512 bytesI/O size (minimum/optimal): 512 bytes / 512 bytes
Schreiben des Images auf den eMMC
root@bpi-iot-ros-ai:/home/pi# ls2017-08-27-debian-9-stretch-lite-preview-bpi-m2u-sd-emmc.imgroot@bpi-iot-ros-ai:/home/pi# dd if=2017-08-27-debian-9-stretch-lite-preview-bpi-m2u-sd-emmc.img of=/dev/mmcblk1 bs=10MB
Dann warten wir mal bis er fertig ist........
781+1 records in781+1 records out7818182656 bytes (7.8 GB, 7.3 GiB) copied, 1047.62 s, 7.5 MB/s
Fertig! Ausschalten und dann SD-Karte raus und wieder einschalten. Startet ?
root@bpi-iot-ros-ai:/home/pi# df -hFilesystem Size Used Avail Use% Mounted on/dev/root 6.9G 1.4G 5.1G 22% /devtmpfs 879M 0 879M 0% /devtmpfs 1007M 0 1007M 0% /dev/shmtmpfs 1007M 8.7M 998M 1% /runtmpfs 5.0M 4.0K 5.0M 1% /run/locktmpfs 1007M 0 1007M 0% /sys/fs/cgrouptmpfs 1007M 136K 1007M 1% /tmptmpfs 202M 0 202M 0% /run/user/1000
/dev/root ist 6,9GB groß. Ein bißchen wenig...
Kurz die Festplatte formatieren.
mkfs.ext4 /dev/sda1
Hier etwas ausführlicher erklärt. Bananian auf HDD installieren
mount /dev/sda1 /mnt/
rsync -ax / /mnt/
Der Mountbefehl hängt uns die Festplatte ins System ein. Der rsync kopiert das System auf die Platte. Zeit für einen Kaffee..
Den Mount wieder entfernen
umount /mnt/
Die Bootpartition des eMMC mounten
mount /dev/mmcblk0p1 /mnt
Die Startdatei ändern. Hier bin ich mir nicht 100% sicher, ich hab alle Dateien geändert.
nano /mnt/bananapi/bpi-m2u/linux/720p/uEnv.txt
Vorher
root=/dev/mmcblk0p2 rootfstype=ext4 rw rootwait bootmenutimeout=10 datadev=mmcblk0p2console=earlyprintk=sunxi-uart,0x01c28000 console=tty1 console=ttyS0,115200n8 no_console_suspend consoleblank=0bootopts=enforcing=1 initcall_debug=0 loglevel=4 init=/init cma=256M panic=10volumioarg=imgpart=/dev/mmcblk0p2 imgfile=/volumio_current.sqsh rw rootwait
Nachher
root=/dev/sda1 rootfstype=ext4 rw rootwait bootmenutimeout=10 datadev=sda1console=earlyprintk=sunxi-uart,0x01c28000 console=tty1 console=ttyS0,115200n8 no_console_suspend consoleblank=0bootopts=enforcing=1 initcall_debug=0 loglevel=4 init=/init cma=256M panic=10volumioarg=imgpart=/dev/sda1 imgfile=/volumio_current.sqsh rw rootwait
Fertig! Bootet vom eMMC und benutzt dann die Festplatte.
root@bpi-iot-ros-ai:/# df -hFilesystem Size Used Avail Use% Mounted on/dev/root 220G 1.5G 207G 1% /devtmpfs 879M 0 879M 0% /devtmpfs 1007M 0 1007M 0% /dev/shmtmpfs 1007M 8.7M 998M 1% /runtmpfs 5.0M 4.0K 5.0M 1% /run/locktmpfs 1007M 0 1007M 0% /sys/fs/cgrouptmpfs 1007M 136K 1007M 1% /tmptmpfs 202M 0 202M 0% /run/user/1000
Ziel erreicht. Dann schauen wir uns mal um und schauen ob das genauso gut läuft als Debian 9 \"Stretch\" auf BananaPi installieren
Update 28.08.2017 21:15
WLan ausprobiert. Schauen wir mal nach..
root@bpi-iot-ros-ai:/home/pi# iwconfigwlan0 IEEE 802.11bg ESSID:off/anyMode:Managed Access Point: Not-AssociatedRetry long limit:7 RTS thr:off Fragment thr:offEncryption key:offPower Management:on
sit0 no wireless extensions.
dummy0 no wireless extensions.
lo no wireless extensions.
eth0 no wireless extensions.
tunl0 no wireless extensions.
Das Device wlan0 scheint schon mal da zu sein. Konfigurieren wir es in der Datei /etc/network/interfaces
nano /etc/network/interfaces
# Wired adapter #1auto eth0iface eth0 inet dhcp# hwaddress ether # if you want to set MAC manually# pre-up /sbin/ifconfig eth0 mtu 3838 # setting MTU for DHCP, static just: mtu 3838## Wired adapter #2#auto eth1# iface eth1 inet dhcp# hwaddress ether # if you want to set MAC manually# pre-up /sbin/ifconfig eth0 mtu 3838 # setting MTU for DHCP, static just: mtu 3838## Wireless adapter #1auto wlan0iface wlan0 inet dhcpwpa-ssid "SSID"wpa-psk xxxxxxxxxxxxxxxxxxxxxxxxxxxxxxxxxxxxxxxxxxxxxxxxxxx# to generate proper encrypted key: wpa_passphrase yourSSID yourpassword#auto wlan0# iface wlan0 inet dhcp# wpa-ssid bananapi# wpa-psk "88888888"# Local loopbackauto loiface lo inet loopback
Wie immer, die SSID und das PW eintragen. Bitte beachtet bitte die Zeile unter wpa-psk ! Danach starten wir das Device.
root@bpi-iot-ros-ai:/home/pi# ifup wlan0Internet Systems Consortium DHCP Client 4.3.5Copyright 2004-2016 Internet Systems Consortium.All rights reserved.For info, please visit https://www.isc.org/software/dhcp/
Listening on LPF/wlan0/44:2c:05:ed:80:7dSending on LPF/wlan0/44:2c:05:ed:80:7dSending on Socket/fallbackDHCPDISCOVER on wlan0 to 255.255.255.255 port 67 interval 4DHCPDISCOVER on wlan0 to 255.255.255.255 port 67 interval 8DHCPREQUEST of 192.168.4.10 on wlan0 to 255.255.255.255 port 67DHCPOFFER of 192.168.4.10 from 192.168.4.1DHCPACK of 192.168.4.10 from 192.168.4.1bound to 192.168.4.10 -- renewal in 1367 seconds.
Das sieht soweit gut aus, das Device wlan0 holt sich beim DHCP-Server eine IP-Adresse.
root@bpi-iot-ros-ai:/home/pi# iperf3 -c 192.168.4.213Connecting to host 192.168.4.213, port 5201[ 4] local 192.168.4.10 port 39343 connected to 192.168.4.213 port 5201[ ID] Interval Transfer Bandwidth Retr Cwnd[ 4] 0.00-1.00 sec 1.79 MBytes 15.0 Mbits/sec 0 115 KBytes[ 4] 1.00-2.00 sec 2.03 MBytes 17.0 Mbits/sec 0 201 KBytes[ 4] 2.00-3.00 sec 1.85 MBytes 15.5 Mbits/sec 0 230 KBytes[ 4] 3.00-4.00 sec 1.80 MBytes 15.1 Mbits/sec 0 240 KBytes[ 4] 4.00-5.00 sec 1.82 MBytes 15.2 Mbits/sec 0 249 KBytes[ 4] 5.00-6.00 sec 1.81 MBytes 15.1 Mbits/sec 0 252 KBytes[ 4] 6.00-7.00 sec 1.58 MBytes 13.3 Mbits/sec 0 253 KBytes[ 4] 7.00-8.00 sec 1.70 MBytes 14.2 Mbits/sec 0 264 KBytes[ 4] 8.00-9.00 sec 1.65 MBytes 13.8 Mbits/sec 0 276 KBytes[ 4] 9.00-10.00 sec 1.67 MBytes 14.0 Mbits/sec 2 218 KBytes- - - - - - - - - - - - - - - - - - - - - - - - -[ ID] Interval Transfer Bandwidth Retr[ 4] 0.00-10.00 sec 17.7 MBytes 14.8 Mbits/sec 2 sender[ 4] 0.00-10.00 sec 17.3 MBytes 14.5 Mbits/sec receiver
iperf Done.root@bpi-iot-ros-ai:/home/pi# iperf3 -c 192.168.4.213 -RConnecting to host 192.168.4.213, port 5201Reverse mode, remote host 192.168.4.213 is sending[ 4] local 192.168.4.10 port 39345 connected to 192.168.4.213 port 5201[ ID] Interval Transfer Bandwidth[ 4] 0.00-1.00 sec 168 KBytes 1.38 Mbits/sec[ 4] 1.00-2.00 sec 287 KBytes 2.35 Mbits/sec[ 4] 2.00-3.00 sec 69.3 KBytes 567 Kbits/sec[ 4] 3.00-4.00 sec 547 KBytes 4.48 Mbits/sec[ 4] 4.00-5.00 sec 605 KBytes 4.96 Mbits/sec[ 4] 5.00-6.00 sec 583 KBytes 4.77 Mbits/sec[ 4] 6.00-7.00 sec 225 KBytes 1.84 Mbits/sec[ 4] 7.00-8.00 sec 72.1 KBytes 591 Kbits/sec[ 4] 8.00-9.00 sec 703 KBytes 5.76 Mbits/sec[ 4] 9.00-10.00 sec 270 KBytes 2.21 Mbits/sec- - - - - - - - - - - - - - - - - - - - - - - - -[ ID] Interval Transfer Bandwidth Retr[ 4] 0.00-10.00 sec 3.48 MBytes 2.92 Mbits/sec 34 sender[ 4] 0.00-10.00 sec 3.48 MBytes 2.92 Mbits/sec receiver
iperf Done.
Stand heute, es läuft. Ob man das nutzen kann müsst ihr selber entscheiden.