Debian 8 habe ich ja schon mal installiert und hier beschrieben wie es geht. Debian auf BananaPi installieren
Nun machen wir das Ganze mal mit Debian 9.1 "Stretch". Die Files findet man hier Beide Files die wir brauchen runterladen.
- firmware.BananaPi.img.gz
- partition.img.gz
Wir machen wieder ein Image daraus. Alternativ könnte man das auch für den BananaPro, den R1 machen oder den vielen anderen Boards die in dem Verzeichnis aufgeführt sind.
zcat firmware.BananaPi.img.gz partition.img.gz > bpi.img
Das Image ist nur 102,4 MB groß, es handelt sich um eine Netzinstallation. Heißt, es wird fast alles aus dem Netz nachgeladen, also nehmt euch Zeit und einen Kaffee.
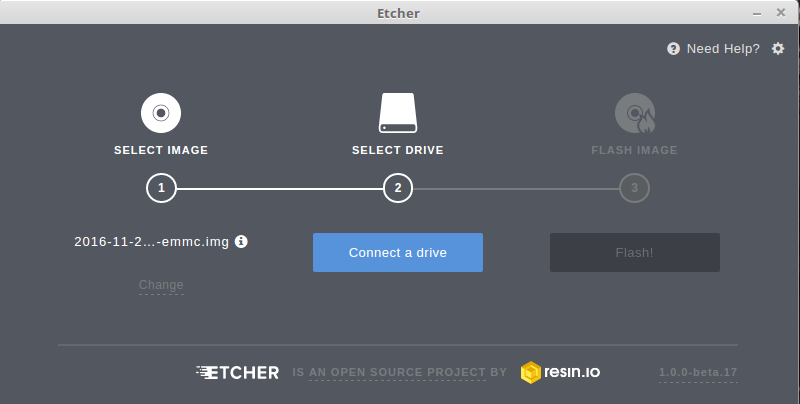
Das Image auf eine SD-Karte brennen. Tipp: etcher.io
Danach ab in den BananaPi und den BananaPi starten. Dann die Installation durchführen. Im o.g. Artikel ist der Installationsvorgang näher beschrieben, ich erspare mir das hier an dieser Stelle da er genau gleich ist. Nach erfolgter Installation einmal neustarten. Und - Fertig!
Bitte dran denken, direkt mit Root anmelden geht nicht, also erst mit dem Benutzer anmelden!
frank@debian:~$ uname -aLinux debian 4.9.0-3-armmp-lpae #1 SMP Debian 4.9.30-2+deb9u3 (2017-08-06) armv7l
Kernelversion ist 4.9.30, aktuell ist 4.9.44
root@debian:/home/frank# lsb_release -a
No LSB modules are available.
Distributor ID: Debian
Description: Debian GNU/Linux 9.1 (stretch)
Release: 9.1
Codename: stretch
root@debian:/home/frank#
IPerf3 Test
frank@frank-MS-7850:~$ iperf3 -s-----------------------------------------------------------Server listening on 5201-----------------------------------------------------------Accepted connection from 192.168.3.10, port 37558[ 5] local 192.168.3.213 port 5201 connected to 192.168.3.10 port 37560[ ID] Interval Transfer Bandwidth[ 5] 0.00-1.00 sec 56.5 MBytes 474 Mbits/sec[ 5] 1.00-2.00 sec 59.2 MBytes 497 Mbits/sec[ 5] 2.00-3.00 sec 59.2 MBytes 497 Mbits/sec[ 5] 3.00-4.00 sec 59.4 MBytes 498 Mbits/sec[ 5] 4.00-5.00 sec 59.4 MBytes 498 Mbits/sec[ 5] 5.00-6.00 sec 59.2 MBytes 496 Mbits/sec[ 5] 6.00-7.00 sec 59.5 MBytes 500 Mbits/sec[ 5] 7.00-8.00 sec 59.3 MBytes 497 Mbits/sec[ 5] 8.00-9.00 sec 59.4 MBytes 498 Mbits/sec[ 5] 9.00-10.00 sec 58.6 MBytes 492 Mbits/sec[ 5] 10.00-10.05 sec 2.88 MBytes 503 Mbits/sec- - - - - - - - - - - - - - - - - - - - - - - - -[ ID] Interval Transfer Bandwidth Retr[ 5] 0.00-10.05 sec 593 MBytes 495 Mbits/sec 0 sender[ 5] 0.00-10.05 sec 593 MBytes 495 Mbits/sec receiver-----------------------------------------------------------Server listening on 5201-----------------------------------------------------------^Ciperf3: interrupt - the server has terminatedfrank@frank-MS-7850:~$ iperf3 -c 192.168.3.10Connecting to host 192.168.3.10, port 5201[ 4] local 192.168.3.213 port 35432 connected to 192.168.3.10 port 5201[ ID] Interval Transfer Bandwidth Retr Cwnd[ 4] 0.00-1.00 sec 109 MBytes 918 Mbits/sec 0 280 KBytes[ 4] 1.00-2.00 sec 111 MBytes 928 Mbits/sec 0 796 KBytes[ 4] 2.00-3.00 sec 112 MBytes 938 Mbits/sec 0 796 KBytes[ 4] 3.00-4.00 sec 111 MBytes 935 Mbits/sec 0 837 KBytes[ 4] 4.00-5.00 sec 113 MBytes 946 Mbits/sec 0 1.00 MBytes[ 4] 5.00-6.00 sec 112 MBytes 937 Mbits/sec 214 758 KBytes[ 4] 6.00-7.00 sec 112 MBytes 941 Mbits/sec 0 758 KBytes[ 4] 7.00-8.00 sec 112 MBytes 943 Mbits/sec 0 758 KBytes[ 4] 8.00-9.00 sec 112 MBytes 940 Mbits/sec 0 1018 KBytes[ 4] 9.00-10.00 sec 112 MBytes 940 Mbits/sec 0 1.03 MBytes- - - - - - - - - - - - - - - - - - - - - - - - -[ ID] Interval Transfer Bandwidth Retr[ 4] 0.00-10.00 sec 1.09 GBytes 937 Mbits/sec 214 sender[ 4] 0.00-10.00 sec 1.09 GBytes 936 Mbits/sec receiver
iperf Done.
Im ersten Test ist mein Haupt-PC der Server, im zweiten Test der BananaPi. Alle Tests mit einer SD-Karte!
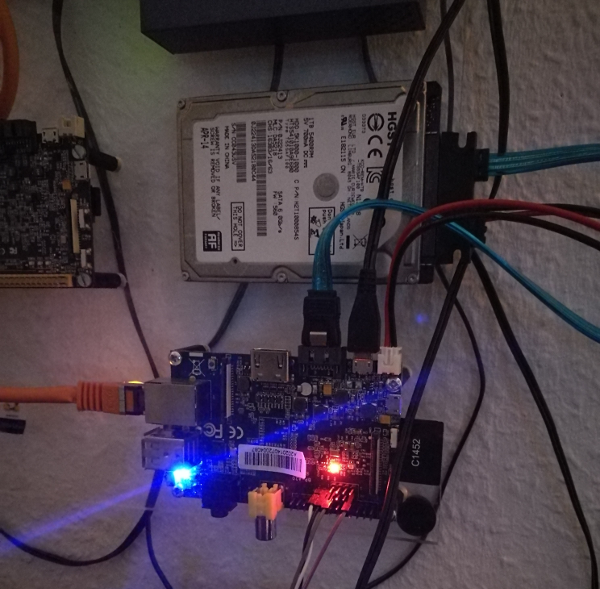
Debian 9.1 auf HDD installieren
Und nun ab damit auf eine HDD oder nehm ich lieber die SSD? Kurz nachdenken....
Es ist die HDD geworden. Nun richten wir das System ein, so wie in folgendem Artikel erklärt. Bananian auf HDD installieren
rsync war nicht installiert, aber das ist ja kein Problem.
apt-get install rsync
Nachdem wir nun alles auf der HDD haben, stellt sich mir die Frage wie stelle ich die Bootparameter ein. Es gibt im Ordner /boot die Datei boot.scr, die kann man aber nicht bearbeiten. Also ein wenig in den Erinnerungen kramen und google befragen. Es geht eigentlich genauso, wie im o.g. Artikel schon dargestellt aber hier nochmal korrekt dargestellt.
Bootparameter ändern
Wir installieren auf dem Notebook die u-boot-tools, darin ist mkimage was wir gleich brauchen.
apt-get install u-boot-tools
Dann kopieren wir die Datei boot.scr mit folgendem Befehl.
dd if=boot.scr of=boot.script bs=72 skip=1
Jetzt haben wir die Datei, die wir anpassen können.
# boot script for Allwinner SunXi-based devices
# Mainline u-boot v2014.10 introduces a new default environment and# a new common bootcmd handling for all platforms, which is not fully# compatible with the old-style environment used by u-boot-sunxi.# This script therefore needs to check in which environment it# is running and set some variables accordingly.
# On u-boot-sunxi, this script assumes that ${device} and ${partition}# are set.
# The new-style environment predefines ${boot_targets}, the old-style# environment does not.if test -n "${boot_targets}"thenecho "Mainline u-boot / new-style environment detected."# Mainline u-boot v2014.10 uses ${devtype}, ${devnum} and# ${bootpart} where u-boot-sunxi uses ${device} and ${partition}.# ${distro_bootpart} replaced ${bootpart} in u-boot v2016.01.if test -z "${device}"; then setenv device "${devtype}"; fiif test -z "${partition}${distro_bootpart}"; then setenv partition "${devnum}:${bootpart}"; fiif test -z "${partition}"; then setenv partition "${devnum}:${distro_bootpart}"; fielseecho "U-boot-sunxi / old-style environment detected."# U-boot-sunxi does not predefine kernel_addr_r, fdt_addr_r and# ramdisk_addr_r, so they have to be manually set. Use the values# from mainline u-boot v2014.10, except for ramdisk_addr_r,# which is set to 0x44300000 to allow for initrds larger than# 13MB on u-boot-sunxi.setenv kernel_addr_r 0x42000000setenv fdt_addr_r 0x43000000setenv ramdisk_addr_r 0x44300000fi
if test -n "${console}"; thensetenv bootargs "${bootargs} console=${console}"fi
setenv bootargs ${bootargs} root=/dev/sda1
image_locations='/boot/ /'if test -z "${fk_kvers}"; thensetenv fk_kvers '4.9.0-3-armmp-lpae'fi
if test -n "${fdtfile}"; thensetenv fdtpath dtbs/${fk_kvers}/${fdtfile}elsesetenv fdtpath dtb-${fk_kvers}fi
for pathprefix in ${image_locations}doif test -e ${device} ${partition} ${pathprefix}vmlinuz-${fk_kvers}thenload ${device} ${partition} ${kernel_addr_r} ${pathprefix}vmlinuz-${fk_kvers} \&& load ${device} ${partition} ${fdt_addr_r} ${pathprefix}${fdtpath} \&& load ${device} ${partition} ${ramdisk_addr_r} ${pathprefix}initrd.img-${fk_kvers} \&& echo "Booting Debian ${fk_kvers} from ${device} ${partition}..." \&& bootz ${kernel_addr_r} ${ramdisk_addr_r}:${filesize} ${fdt_addr_r}
setenv ramdisk_addr_r 0x44300000fi
if test -n "${console}"; thensetenv bootargs "${bootargs} console=${console}"fi
setenv bootargs ${bootargs} root=/dev/sda1
image_locations='/boot/ /'if test -z "${fk_kvers}"; thensetenv fk_kvers '4.9.0-3-armmp-lpae'fi
if test -n "${fdtfile}"; thensetenv fdtpath dtbs/${fk_kvers}/${fdtfile}elsesetenv fdtpath dtb-${fk_kvers}fi
for pathprefix in ${image_locations}doif test -e ${device} ${partition} ${pathprefix}vmlinuz-${fk_kvers}thenload ${device} ${partition} ${kernel_addr_r} ${pathprefix}vmlinuz-${fk_kvers} \&& load ${device} ${partition} ${fdt_addr_r} ${pathprefix}${fdtpath} \&& load ${device} ${partition} ${ramdisk_addr_r} ${pathprefix}initrd.img-${fk_kvers} \&& echo "Booting Debian ${fk_kvers} from ${device} ${partition}..." \&& bootz ${kernel_addr_r} ${ramdisk_addr_r}:${filesize} ${fdt_addr_r}fidone
Eine recht lange Datei, es interessiert uns aber nur folgende Zeile.
setenv bootargs ${bootargs} quiet
Die ändern wir in
setenv bootargs ${bootargs} root=/dev/sda1
Jetzt machen wir aus der Datei wieder eine funktionierende boot.scr
mkimage -C none -A arm -T script -d boot.script boot.scr
Fertig!
Ich bedanke mich beim Olimex-Team für die einzige vernünftige Erklärung, die ich im Netz gefunden habe. Danke!
http://keesj.github.io/A10-OLinuXino-LIME-5510-Shield/sw_install.html
Schauen wir nach ob es geklappt hat.
root@debian:/# df -hFilesystem Size Used Avail Use% Mounted onudev 483M 0 483M 0% /devtmpfs 100M 1.5M 99M 2% /run/dev/sda1 916G 770M 869G 1% /tmpfs 500M 0 500M 0% /dev/shmtmpfs 5.0M 0 5.0M 0% /run/locktmpfs 500M 0 500M 0% /sys/fs/cgroup/dev/mmcblk0p1 236M 25M 199M 11% /boottmpfs 100M 0 100M 0% /run/user/1000
Sieht gut aus ?
IPerf3 Test mit HDD
frank@frank-MS-7850:~$ iperf3 -s-----------------------------------------------------------Server listening on 5201-----------------------------------------------------------Accepted connection from 192.168.3.10, port 56374[ 5] local 192.168.3.213 port 5201 connected to 192.168.3.10 port 56376[ ID] Interval Transfer Bandwidth[ 5] 0.00-1.00 sec 57.0 MBytes 478 Mbits/sec[ 5] 1.00-2.00 sec 59.5 MBytes 499 Mbits/sec[ 5] 2.00-3.00 sec 59.6 MBytes 500 Mbits/sec[ 5] 3.00-4.00 sec 59.8 MBytes 502 Mbits/sec[ 5] 4.00-5.00 sec 67.7 MBytes 568 Mbits/sec[ 5] 5.00-6.00 sec 81.1 MBytes 680 Mbits/sec[ 5] 6.00-7.00 sec 81.7 MBytes 685 Mbits/sec[ 5] 7.00-8.00 sec 81.5 MBytes 684 Mbits/sec[ 5] 8.00-9.00 sec 81.5 MBytes 684 Mbits/sec[ 5] 9.00-10.00 sec 81.7 MBytes 685 Mbits/sec[ 5] 10.00-10.05 sec 3.90 MBytes 683 Mbits/sec- - - - - - - - - - - - - - - - - - - - - - - - -[ ID] Interval Transfer Bandwidth Retr[ 5] 0.00-10.05 sec 715 MBytes 597 Mbits/sec 0 sender[ 5] 0.00-10.05 sec 715 MBytes 597 Mbits/sec receiver-----------------------------------------------------------Server listening on 5201-----------------------------------------------------------^Ciperf3: interrupt - the server has terminatedfrank@frank-MS-7850:~$ iperf3 -c 192.168.3.10Connecting to host 192.168.3.10, port 5201[ 4] local 192.168.3.213 port 37586 connected to 192.168.3.10 port 5201[ ID] Interval Transfer Bandwidth Retr Cwnd[ 4] 0.00-1.00 sec 109 MBytes 915 Mbits/sec 0 280 KBytes[ 4] 1.00-2.00 sec 112 MBytes 940 Mbits/sec 0 313 KBytes[ 4] 2.00-3.00 sec 112 MBytes 942 Mbits/sec 0 329 KBytes[ 4] 3.00-4.00 sec 110 MBytes 925 Mbits/sec 0 939 KBytes[ 4] 4.00-5.00 sec 112 MBytes 941 Mbits/sec 0 1.18 MBytes[ 4] 5.00-6.00 sec 112 MBytes 939 Mbits/sec 0 1.18 MBytes[ 4] 6.00-7.00 sec 112 MBytes 942 Mbits/sec 0 1.18 MBytes[ 4] 7.00-8.00 sec 112 MBytes 941 Mbits/sec 0 1.18 MBytes[ 4] 8.00-9.00 sec 112 MBytes 944 Mbits/sec 0 1.18 MBytes[ 4] 9.00-10.00 sec 112 MBytes 937 Mbits/sec 0 1.18 MBytes- - - - - - - - - - - - - - - - - - - - - - - - -[ ID] Interval Transfer Bandwidth Retr[ 4] 0.00-10.00 sec 1.09 GBytes 937 Mbits/sec 0 sender[ 4] 0.00-10.00 sec 1.09 GBytes 936 Mbits/sec receiver
iperf Done.frank@frank-MS-7850:~$
Ergänzungen
In der alten Debian Version 8 war der SSH Zugang von extern noch geblockt, das hat man in 9.1 nun wieder geändert. Macht ja auch nicht wirklich Sinn, wenn ich einen OpenSSH-Server installiere, dann möchte ich ja auch von extern connecten!? Das erste was ich immer mache, so bald so ein BPi läuft. Auf dem Haupt-PC arbeitet man halt am liebsten ?
Schnell noch ein Test auf offene Ports
frank@frank-MS-7850:~$ nmap -v -Pn 192.168.3.204Starting Nmap 7.01 ( https://nmap.org ) at 2017-08-25 10:14 CESTInitiating Parallel DNS resolution of 1 host. at 10:14Completed Parallel DNS resolution of 1 host. at 10:14, 0.00s elapsedInitiating Connect Scan at 10:14Scanning 192.168.3.204 [1000 ports]Discovered open port 22/tcp on 192.168.3.204Completed Connect Scan at 10:14, 0.03s elapsed (1000 total ports)Nmap scan report for 192.168.3.204Host is up (0.0033s latency).Not shown: 999 closed portsPORT STATE SERVICE22/tcp open sshRead data files from: /usr/bin/../share/nmapNmap done: 1 IP address (1 host up) scanned in 0.07 seconds
Gut, wie zu erwarten nur der SSH Port offen.
Fazit
Ist etwas länger geworden als eigentlich geplant, aber Ziel erreicht. Debian 9.1 läuft auf dem BananaPi und jetzt schauen wir mal ob das Ganze auch stabiler läuft als meine letzte Armbian-Installation. Die hatte sich zwischenzeitlich nämlich schon wieder verabschiedet ? Das ist für mich leider dann nicht einsetzbar, ich nutze die kleinen Dinger meistens als Datengrab zur Sicherung.
Ich denke mit dieser Debian Version kann man ganz gut einen Datenspeicher im Heimnetzwerk aufbauen, wir haben ein sicheres System was sehr stabil laufen sollte. Na dann viel Spaß beim Ausprobieren.